Mastering Atmospheric Depth with Realistic Rain Stamp Brushes
Creating a convincing weather effect in digital art is often more challenging than it appears. Many designers and illustrators struggle to capture the chaotic yet rhythmic nature of falling precipitation, resulting in static or artificial-looking compositions. This is where specialized tools like Realistic Rain Stamp Brushes become indispensable. Rather than manually painting thousands of individual droplets, these assets allow you to generate complex rain textures in just a few clicks. However, simply downloading a brush pack is not enough to guarantee professional results. Understanding how to integrate these tools correctly into your workflow is crucial for maintaining high-quality output.
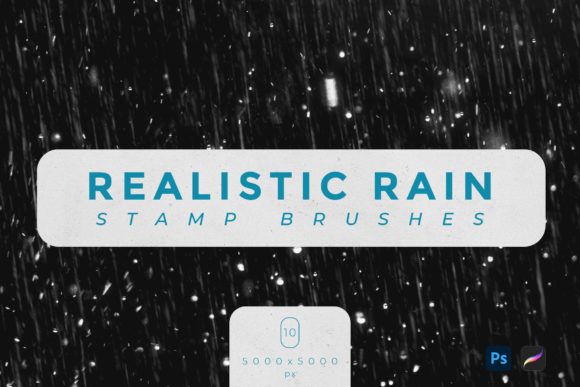
When you acquire a set of ten realistic rain stamp brushes, you are gaining access to pre-configured dynamics that mimic the physics of water. These brushes typically come in high-resolution formats, such as 5000x5000 px, ensuring that even when scaled up for large prints or detailed illustrations, the edges remain crisp and natural. The included files, usually in .ABR format for Adobe Photoshop and .Brushset for Procreate, are designed to work seamlessly within these specific ecosystems. Yet, many users overlook the technical requirements and artistic nuances necessary to make these stamps look authentic rather than pasted on.
Avoiding the Trap of Uniformity
One of the most common mistakes beginners make when using rain stamps is applying them with uniform opacity and spacing. Rain in the real world is rarely consistent; it varies in density, speed, and visibility based on wind and distance. If you click repeatedly with the same pressure and settings, your artwork will look patterned and repetitive. This destroys the immersion you are trying to build. To avoid this, you must vary your brush size and opacity dynamically. Use a graphics tablet to leverage pressure sensitivity, allowing lighter touches to create misty background rain and heavier presses to define foreground droplets.
Another frequent oversight is ignoring the directionality of the storm. Rain rarely falls perfectly vertically unless there is absolutely no wind. Failing to adjust the angle of your brush strokes can make the scene feel stagnant. Most professional software allows you to rotate the brush tip or use transformation tools to align the rain with the perspective of your scene. By matching the angle of the rain to other environmental elements, such as blowing trees or tilted umbrellas, you create a cohesive narrative within the image. This attention to detail separates amateur edits from professional digital paintings.
Resolution and Compatibility Misconceptions
It is vital to check the technical specifications before purchasing or downloading any digital asset. The Realistic Rain Stamp Brushes mentioned here are optimized for high-resolution work, with dimensions of 5000x5000 px. Some users mistakenly believe that lower resolution brushes are sufficient for web-only projects, but this limits future usability. If you ever decide to print your work or use it in a high-definition video project, low-res assets will pixelate and degrade the overall quality. Starting with high-quality sources ensures flexibility and longevity for your creative assets.
Furthermore, compatibility is a critical factor that is often ignored until after purchase. These specific brushes are designed exclusively for Adobe Photoshop and Procreate. Attempting to use .ABR files in software like Clip Studio Paint or Affinity Photo without proper conversion can lead to frustration and lost time. Always verify that your software version supports the file type provided. For Procreate users, ensure your iPad model can handle the high-resolution texture data without lagging. Understanding these constraints beforehand prevents workflow interruptions and ensures a smooth creative process.
Layering for Depth and Realism
A single layer of rain stamps rarely looks convincing. Professional artists use multiple layers to simulate depth of field. Start by creating a background layer with larger, softer, and more transparent rain stamps to represent distant precipitation. Then, add a middle layer with medium-sized drops at higher opacity. Finally, create a foreground layer with sharp, high-contrast droplets. This technique mimics how the human eye perceives depth, where objects closer to the viewer appear sharper and more defined. Neglecting this layering process results in a flat image where the rain feels like a superficial overlay rather than an integrated part of the environment.
Additionally, consider the interaction between the rain and the rest of your scene. Rain does not exist in a vacuum; it affects lighting and color. After applying your rain stamps, use adjustment layers to tweak the color balance. Rainy days often have cooler, bluer tones due to overcast skies. Adding a slight blue tint to your rain layers can help them blend more naturally with the ambient light. You might also add subtle glow effects to highlight the edges of the droplets, simulating how light refracts through water. These small adjustments significantly enhance the realism of the effect.
Choosing the Right Tool for Your Project
Before committing to a specific brush pack, evaluate your specific needs. Are you creating quick social media graphics, or are you working on a detailed matte painting? The ten brushes included in this set offer variety, but understanding when to use each one is key. Some stamps may be better suited for heavy downpours, while others might mimic a light drizzle. Test each brush on a blank canvas to understand its unique characteristics, such as scatter, spacing, and texture grain. This preliminary exploration saves time during actual projects and helps you develop a personal library of go-to techniques.
Moreover, consider the source of your digital tools. Reputable creators provide clear documentation and support. When you download files like .ABR or .Brushset, ensure they come from trusted platforms to avoid corrupted files or malware. High-quality resources often include tips on usage, which can accelerate your learning curve. Investing in well-made assets like these Realistic Rain Stamp Brushes is not just about saving time; it is about elevating the standard of your work. By avoiding common pitfalls and applying thoughtful techniques, you can transform simple digital strokes into compelling atmospheric experiences.
Ultimately, the goal is to enhance your storytelling through visual cues. Rain evokes emotion, whether it is melancholy, renewal, or tension. Using these tools effectively allows you to convey those feelings more powerfully. Remember to experiment, layer your effects, and pay attention to the physical properties of water. With practice and the right resources, creating a realistic rain texture effect becomes not just a technical task, but an intuitive part of your artistic expression. Check your software compatibility, respect the resolution limits, and always strive for natural variation in your application. These steps will ensure that your final output is both visually stunning and professionally polished.