Mastering Continuous Line Art with Decorative Line Brushes V1 for Procreate
Hi, and welcome to my shop. If you have been searching for a way to elevate your digital illustrations without getting bogged down by complex layer management or tedious vector tracing, you are in the right place. The Decorative Line Brushes V1 for Procreate represents a streamlined approach to continuous line art, offering a blend of aesthetic beauty and functional simplicity. However, many creators dive into digital brush sets with assumptions that can hinder their workflow rather than help it. Understanding the nuances of this specific toolset is crucial for maximizing its potential on your iPad.
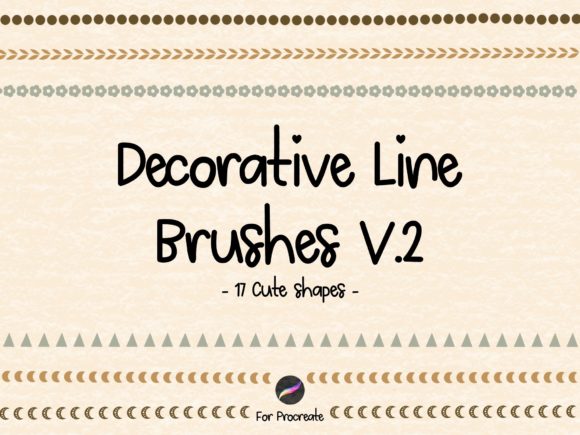
This download features beautiful, custom continuous line brushes packaged in a single brush set, ready to be used immediately in your Procreate app. It is designed to serve dual purposes: as a decorative element for intricate designs and as a lettering brush for hand-drawn typography. While the promise of "one-tap installation" sounds straightforward, the real value lies in how you integrate these tools into your creative process. Let’s explore common pitfalls users encounter and how to avoid them to ensure you get the most out of this purchase.
Understanding the Dual Nature of the Brush Set
A frequent misunderstanding among beginners is categorizing brushes strictly as either "drawing" or "writing" tools. The Decorative Line Brushes V1 defies this binary. Because it is optimized for continuous lines, it behaves differently than standard ink pens or calligraphy brushes. Users often make the mistake of applying heavy pressure variations, expecting the brush to mimic a traditional fountain pen’s nib spread. This leads to inconsistent line weights that break the fluidity of the continuous line style.
To avoid this, recognize that this brush set thrives on consistency. The beauty of continuous line art lies in the unbroken flow. When using these brushes for lettering, focus on the rhythm of your stroke rather than forceful pressure changes. For decorative elements, let the brush’s inherent texture do the work. By adjusting your expectation from "control every pixel" to "guide the flow," you will achieve smoother, more professional-looking results. This shift in mindset prevents frustration and reduces the time spent erasing and correcting jagged edges.
The Importance of Device Compatibility
One of the most critical details overlooked during the purchasing phase is hardware compatibility. It is essential to note that this .brushset file must be used with the Procreate app on iPad only. A common error occurs when users attempt to import these files into Procreate Pocket on iPhone or other digital art applications like Adobe Fresco or Clip Studio Paint. These platforms use different brush engines, meaning the file will simply not load, leading to confusion and perceived product failure.
Before downloading, verify that you have an iPad with Procreate installed. This ensures that the brush dynamics, spacing, and texture rendering perform exactly as intended. If you are planning to switch devices in the future, remember that Procreate files are not universally transferable to other software ecosystems. Checking this requirement beforehand saves you from unnecessary support queries and ensures a seamless setup experience.
Navigating the Installation Process Correctly
While the installation process is designed to be user-friendly, minor technical hiccups can occur if the steps are not followed precisely. Many users download the file on a desktop computer and then struggle to locate it on their iPad. The correct workflow involves ensuring the file lands in your iPad’s Files app. Here is a practical breakdown of what to check:
- Locate the Download: Once you download the files, open the Files app on your iPad and navigate to the Downloads section.
- Identify the File: Look specifically for the .brushset extension. Do not attempt to unzip or modify the file structure, as this can corrupt the brush data.
- One-Tap Import: Tap on the .brushset file once. Procreate should launch automatically, and the brushes will be added to your library. If Procreate does not open, check your default app settings.
A common mistake is tapping the file multiple times rapidly, which can cause the app to glitch or create duplicate entries. Patience is key here. Allow the system a few seconds to process the import. If the brushes do not appear immediately, restart the Procreate app. This simple troubleshooting step resolves most visibility issues without requiring technical support.
Optimizing Your Workflow for Efficiency
Creators often overlook the organizational aspect of new brush sets. Dropping a new set into your general brush library can lead to clutter, making it difficult to find the right tool during a creative flow. A better approach is to create a dedicated folder within Procreate for your decorative tools. Move the Decorative Line Brushes V1 into this folder immediately after installation. This keeps your workspace tidy and allows you to focus on creation rather than searching.
Furthermore, consider the canvas resolution. Continuous line art can look pixelated if the canvas DPI is too low. Before starting your project, ensure your canvas is set to at least 300 DPI if you intend to print your work, or higher if you are creating large-scale digital prints. Using high-quality brushes on a low-resolution canvas negates the benefits of the tool, resulting in blurry outputs that require rework. Setting up your canvas correctly from the start preserves the crispness of the line work.
Maximizing Versatility in Design Projects
Because this set functions as both a decorative and lettering brush, it offers significant versatility for entrepreneurs and marketers. You might use it to create elegant logos, social media graphics, or personalized greeting cards. However, a common pitfall is overusing the same brush stroke pattern, which can make designs feel repetitive. To counter this, experiment with combining the continuous line brushes with solid shapes or textured backgrounds. This contrast highlights the delicacy of the line work and adds depth to your composition.
For educators and bloggers, these brushes can be used to create engaging headers or instructional diagrams. The continuous nature of the lines guides the viewer’s eye naturally across the page, improving readability and engagement. When using the brushes for text, ensure there is adequate spacing between letters to maintain legibility. Overcrowding decorative lettering is a frequent error that diminishes communication effectiveness.
Final Considerations Before You Create
Investing in digital tools is about enhancing your creative capability, not just accumulating files. The Decorative Line Brushes V1 for Procreate is a specialized tool that rewards mindful usage. By understanding its dual purpose, respecting its platform limitations, and organizing your workflow efficiently, you avoid the common frustrations that plague many digital artists. Remember, the goal is to make your creative process smoother and more enjoyable.
Take a moment to explore the brush settings within Procreate. Adjusting streamlining or size jitter can further customize the brush to your personal style. This level of customization ensures that the tool adapts to you, rather than forcing you to adapt to it. Follow me for more creative Procreate tools and tips that help you refine your digital artistry. With the right approach, this brush set can become a staple in your digital toolkit, enabling you to produce stunning, professional-quality work with ease.